Hy folks, today we’ll see how to consume some simple WSDL using an ADF Data Control. The main ideia is just to see how powerfull adf is to consume in a easy way some WSDL. For this scenario we’ll use Jdeveloper 11.1.1.7.
Using Jdev 11.1.1.7 it’s a good ideia because a lot of Middleware Products are in 11.1.1.* version, so this sample can be used in your Webcenter Portal, Oracle BPM, SOA and others.
There is a lot of options in this tutorial that we will use default option, just to see how easy is. But for advanced stuffs you can check the documentation: http://docs.oracle.com/cd/E18941_01/tutorials/jdtut_11r2_52/jdtut_11r2_52_6.html http://docs.oracle.com/cd/E17904_01/web.1111/b31974/web_services.htm
So, lets open the Jdeveloper (Productivity with Choice )
For this example, we’ll a public free service:
http://www.webservicex.net/BibleWebservice.asmx?WSDL
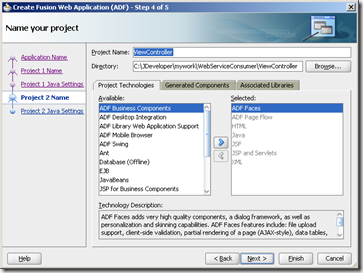
1. Create a new Fusion Middleware Application (You can create any kind of application, since you have ADF Technology in some project)
In ADF Fusion App, we have two projects Model and ViewController. We will consume the WSDL from the Model layer.
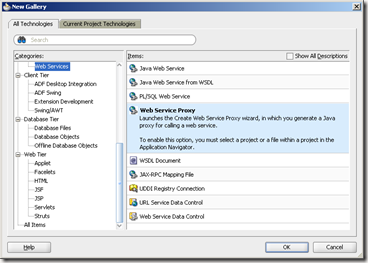
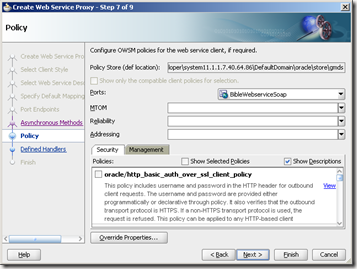
2. Right click in Model project, select New – All Technologies – Web Services – Web Service Proxy
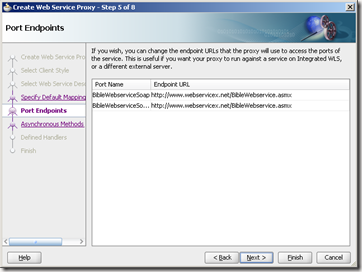
Point to your WSDL, in the case:
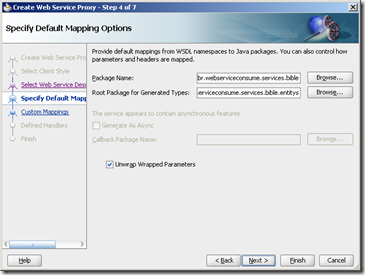
You need to fill the package name and root package for genereted types
I used:
webcenterbr.webserviceconsume.services.bible
webcenterbr.webserviceconsume.services.bible.entity
Now, it’s important to understand that we have a Java class that can be used as proxy to consume the WebService. Until now we dont’ have any data control to consume this service in some Page or Taskflow.
Using this way to consume your webservice, you have more flexiblity to do changes and some not default stuffs. We will create a new Java Class to use as data control.
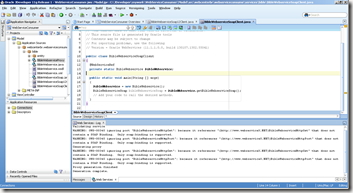
But Jdev it’s very nice, and create a Java main method as sample for us
@WebServiceRef
private static BibleWebservice bibleWebservice;
public static void main(String [] args)
{
bibleWebservice = new BibleWebservice();
BibleWebserviceSoap bibleWebserviceSoap = bibleWebservice.getBibleWebserviceSoap();
// Add your code to call the desired methods.
}
This sample can be used to create your Java class.
3. Create a new Java Class that will be used as Bible Data Control
I’m using the name BibleDC instead of something like BibleWebServiceDC, because for the client doesn’t matter if we are using Webservice or Database, the important is that it’s a Java Class that we can do some stuffs from Bible.
@WebServiceRef
private static BibleWebservice bibleWebservice;
public String consultBibleTitles(){
bibleWebservice = new BibleWebservice();
BibleWebserviceSoap bibleWebserviceSoap = bibleWebservice.getBibleWebserviceSoap();
// Add your code to call the desired methods.
return bibleWebserviceSoap.getBookTitles();
}
I created just a new method that show all book titles from ours WebService.
Let create the data control now. Righ click in new java class – Create Data Control
Now, let’s create the page that shows the data control.
Instead of create just a page and drag and drop the data control, we will create a new taskflow and use this taskflow in our page.
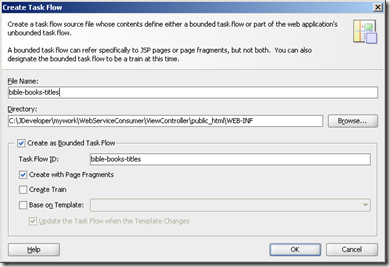
4. So, in ViewController, righ click and select New – JSF – ADF Taskflow
5. Create a new JSF Page Fragment
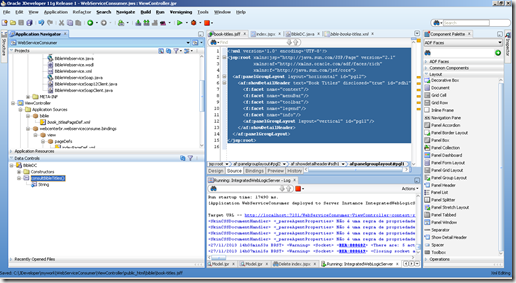
Let’s create some things and user the data control with drag and drop. I wll add a panelGroup with horizontal layout, a showDetailHeader and another panelGroup with vertical layout
<?xml version=’1.0′ encoding=’UTF-8′?>
<jsp:root xmlns:jsp="http://java.sun.com/JSP/Page" version="2.1"
xmlns:af="http://xmlns.oracle.com/adf/faces/rich"
xmlns:f="http://java.sun.com/jsf/core">
<af:panelGroupLayout layout="horizontal" id="pgl2">
<af:showDetailHeader text="Book Titles" disclosed="true" id="sdh1">
<f:facet name="context"/>
<f:facet name="menuBar"/>
<f:facet name="toolbar"/>
<f:facet name="legend"/>
<f:facet name="info"/>
<af:panelGroupLayout layout="vertical" id="pgl1"/>
</af:showDetailHeader>
</af:panelGroupLayout>
</jsp:root>
Now, from your BibleDC drag and drop the consultBibleTitles() method
You must drag and drop inside panelGroupLayout
<af:panelGroupLayout layout="vertical" id="pgl1">
<af:commandButton actionListener="#{bindings.consultBibleTitles.execute}"
text="consultBibleTitles"
disabled="#{!bindings.consultBibleTitles.enabled}"
id="cb1"/>
</af:panelGroupLayout>
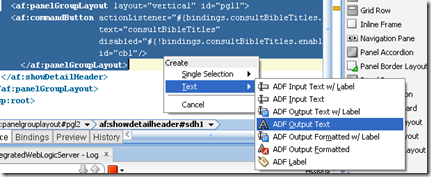
Now drag and drop the result option from your DataControl
<af:panelGroupLayout layout="vertical" id="pgl1">
<af:commandButton actionListener="#{bindings.consultBibleTitles.execute}"
text="consultBibleTitles"
disabled="#{!bindings.consultBibleTitles.enabled}"
id="cb1"/>
<af:outputText value="#{bindings.Return.inputValue}" id="ot1"/>
</af:panelGroupLayout>
Open you book-titles.xml taskflow, drag and drop the page fragment inside
Create a new JSF Page, called index.jsp and drag and drop the book-titles.xml inside. You will see something like that:
<f:view>
<af:document id="d1">
<af:form id="f1">
<af:region value="#{bindings.biblebookstitles1.regionModel}" id="r1"/>
</af:form>
</af:document>
</f:view>
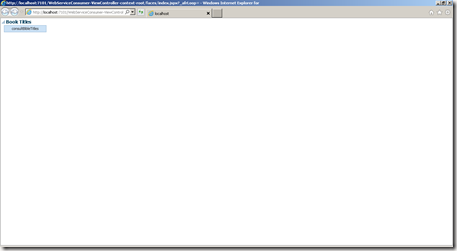
Select index.jspx, righ click and Run
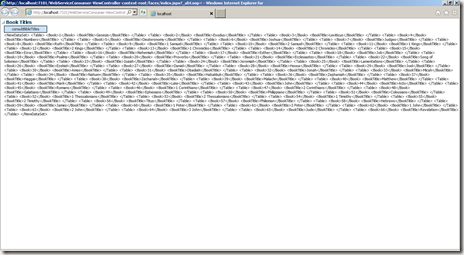
Click in consultBibleTitles:
As you can see it isn’t a friendly result, but you have your DataControl Class and now you can add some rules to make this more friendly.
I hope you liked. The project is attached. In some next posts we will use some more complex services.
See ya
Hi followers, hope you’re good.
Well, today isn’t any todo, or tutorial, or any fix. Today I’ll give a tip from a Book to start your studies with Oracle ADF.
There’s some famous book that you can read, I really recomend Oracle ADF Enterprise Application Development – Made Simple and Oracle Fusion Developer Guide.
But when I read this two books I always thought if there’s some more beginner, and some weeks ago I received a copy from Oracle ADF 11gR@ Development Begginer’s Guide.
Well, this a good way to start your studies, there’s a lot of practice exercises, and it’s easier than Oracle Documentation. So if you want start, maybe it’s a good way.
After this book you should try Oracle ADF Enterprise Application Development – Made Simple, there’s a lot of valuable tips and best practices.
Hope you enjooy.
I see you soon!
Hi everyone, long time since last post. So, let’s go.
In past months I realized that in a production environment you MUST change your security store to LDAP or Database. If you want, the Oracle Documentation helps you (http://docs.oracle.com/cd/E17904_01/core.1111/e10043/cfgauthr.htm#BGBJIACE). If you don’t change to LDAP or Database you’ll have a lot of problems with HA and replication. So, do this!
Well, anyway, I did this some times and I’ll share with you here. After the steps my Custom Portal App start to give me an error in Security Tab. Let’s see soon.
This tutorial is just for Database Store, for LDAP store see the documentation above.
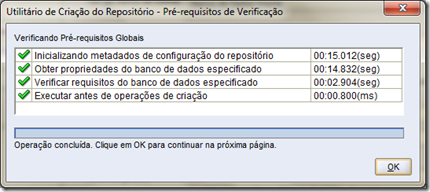
First of all you need ide OPSS schema n your database, so you’ll need run RCU and choose OPSS.
1. Download the RCU (http://www.oracle.com/technetwork/middleware/downloads/fmw-11-download-092893.html)
2. Run the rcu.bat (if you’re in a Windows – you don’t need run the RCU in database server, you run as a client, so run in your work machine)
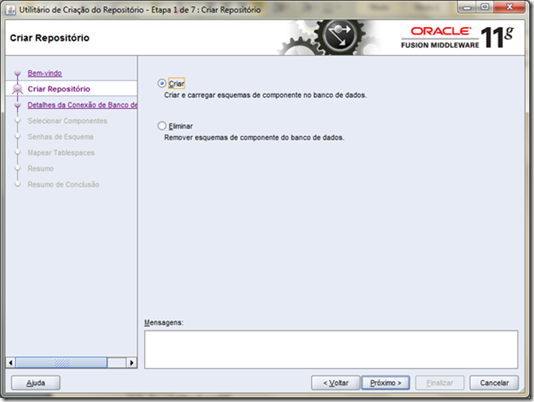
3. Choose create (My PrintScreens are portuguese-brazilian);
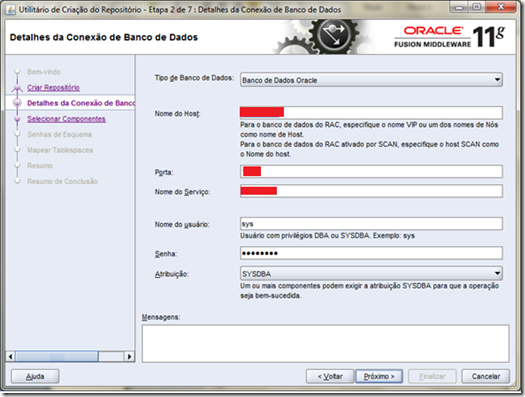
4. Fill your database information in fields available (host name, port, service name, username – must be a sys or sysdba permissions user, and password)
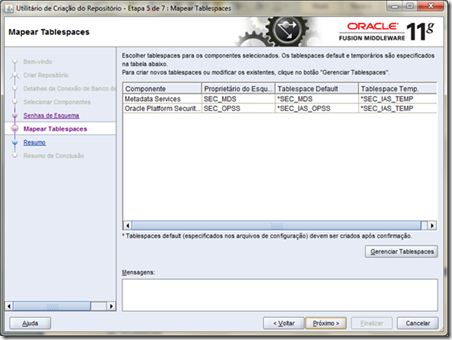
5. Choose your prefix (I used SEC from Security), and chose Metadata Service and Oracle Platform Service, if you already has a Metadata Service in your database maybe you don’t need chose this option.
6. Fill the password for the new users that will be created in your DB (in my case SEC_OPSS and SEC_MDS)
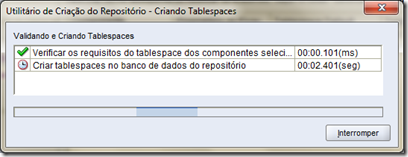
7. Choose create and wait
Now we have a schema with tables created by RCU to store ours security in database. This is a very important step, without this step isn’t possible change the security store.
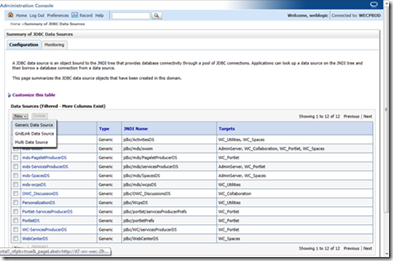
We need create a datasource in our WLS, go to :7001/console”>:7001/console”>http://<host>:7001/console (something like this)
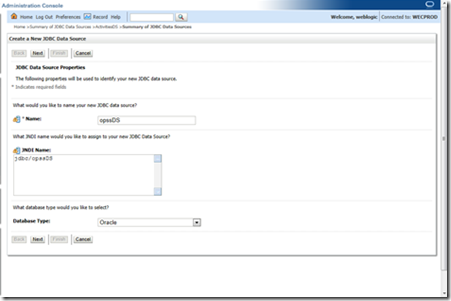
1. New Generic Data Source
Name: opssDS
JNDI Name: jdbc/opssDS
Database Type: Oracle
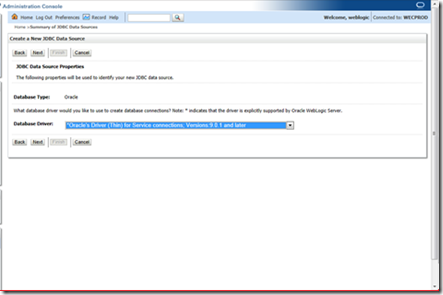
2. Choose Oracle’s Driver (Thin) for Service connections; Version 9.0.1 and later
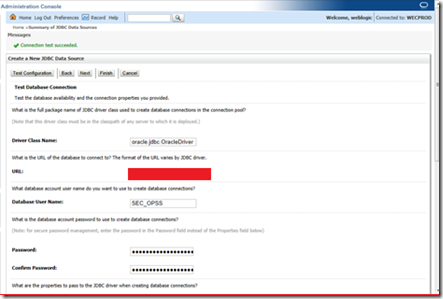
3. Leave the fields as default in next screen
4. Fill your database fields information
Database Name: —-
Host Name: ——-
Port: 1521 (this is de default)
User: SEC_OPSS
5. You must target all managed server
6. Finish and it’s done.
The next step is change in Enterprise Manager the security store to Database (ours cases). Open http://ipaddress:7001/em
1. Click in you weblogic domain name. Choose Weblogic Domain – Security – Security Provider Configuration
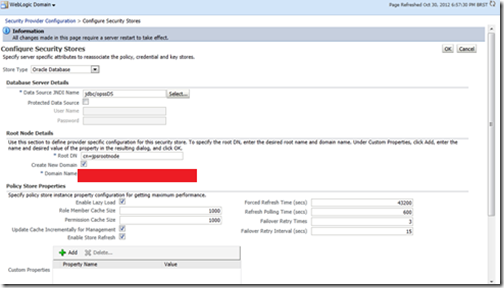
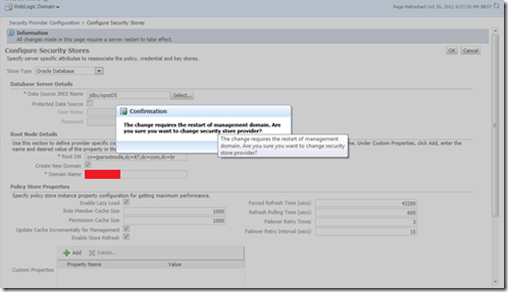
2. Choose “Change store type”
3. Store Type: Oracle Database
Data Source JDNI Name: jdbc/opssDS
Root DN: cn=jpsrootnode (you can choose some value, this is very important if you’re using LDAP, in database storage it will created)
Create New Domain: True (create a new domain IN security store, not a real new WLS Domain)
Domain Name: DOMAIN_NAME
4. Confirm the store change
5. That’s it. Now the security are storage in your database.
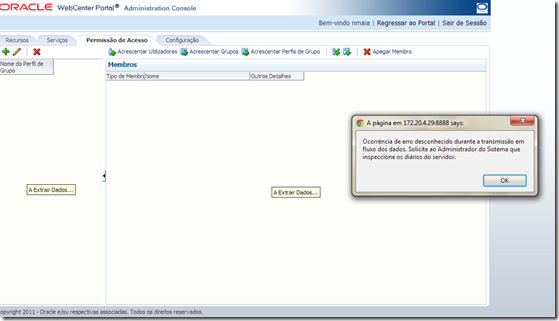
May you have problems in Security Tab in Webcenter Custom Portal Admin. The error will generate a NullPointerExcpetion as in this note from support
Errors Reported Accessing Security Tab in Portal Administration Console [ID 1490968.1]
Let’s see the problemn:
1. Go to your custom application admin: http://localhost:8888/myApp/admin
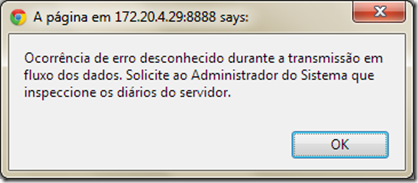
2. Open Security Tab, and:
The error in your log should be something like this:
<Oct 30, 2012 2:39:57 PM BRST> <Error> <oracle.adfinternal.view.faces.config.rich.RegistrationConfigurator> <BEA-000000> <ADF_FACES-60096:Server Exception during PPR, #8
javax.el.ELException: java.lang.NullPointerException
at javax.el.BeanELResolver.getValue(BeanELResolver.java:298)
at com.sun.faces.el.DemuxCompositeELResolver._getValue(DemuxCompositeELResolver.java:173)
at com.sun.faces.el.DemuxCompositeELResolver.getValue(DemuxCompositeELResolver.java:200)
at com.sun.el.parser.AstValue.getValue(AstValue.java:138)
at com.sun.el.parser.AstEqual.getValue(AstEqual.java:54)
at com.sun.el.parser.AstAnd.getValue(AstAnd.java:59)……………………………………………….
…………………………….
…………………..
Caused By: java.lang.NullPointerException
at oracle.webcenter.security.common.WCGroup.<init>(WCGroup.java:74)
at oracle.webcenter.security.common.IdentityWrapper.getGroup(IdentityWrapper.java:183)
at sun.reflect.NativeMethodAccessorImpl.invoke0(Native Method)
at sun.reflect.NativeMethodAccessorImpl.invoke(NativeMethodAccessorImpl.java:57)
at sun.reflect.DelegatingMethodAccessorImpl.invoke(DelegatingM
The Oracle Support Note has a solution for this problemn, this is create a user in Administrators group in your LDAP. I don’t have a Administrators group in my LDAP because I’m using MS-AD, so this solution doesn’t works to me. (Here I’m talk about Security Realms – Provider – LDAP Provider – that provides users to WLS and your Webcenter Application).
So, to solve this, I did:
1. Open Enterprise Manger (host:7001/em)
2. Open you application configurations in EM (just click in your app name)
3. Open Application Deployment – Security – Application Roles
4. Filter Role Starts With : Admin
5. Click in Administrator – Edit
6. Select Administrator and Delete, confirm the delete.
7. Apply this changes clicking in OK
8. Back to your Webcenter Admin, Security Tab and should works.
9. Now works! =D
So, what we did, we removed the Administrators Group to Administrator Webcenter Application Roles, so from now the Administrators for the WLS not are necessarily Administrator for you application. In a lot of cases this make senses.
If there’s some doubt contact me =D I hope that this helps
Today I’ll talk about Webcenter integration with External Application. First of all, I
would like appreciate my friend Sami Koivu for the help that he give me.
When you’re thinking about integration with external applications using Webcenter there are this OOTB options:
- WebClipping Portlet
- Webcenter External Application
- Webcenter Pagelet Producer
- Portlets
It’s important bounce that this isn’t a official documentation about this options, it’s just my experiences trying using it in a real scenario.
The scenario that I’ll simulate here is:
I have a external application with this specifications:
- Java Web application;
- Tomcat as container Java;
- The app login is based on Tomcat Realm;
- Tomcat use cookies for keep the user session
This is a very common scenario since that many clients has Java Web Application with Apache Tomcat.
In the other way I has a Webcenter Portal application that need consume the pages of the application, working like a jsp:include, but always keeping my Portal Template. The final integration should be like a iFrame but without height and width fixed.
The portlets are very useful if for JSF / ADF applications. It’s can be used too if you pretend create some code to integrate the application. I’ll discard this option because my java web application is based only in JSP and Servlets, and I don’t need create integrations with code, I just want “show” my application in a Webcenter Page Template. Anyway if you pretend use portlet, this documentation can help you:
http://download.oracle.com/docs/cd/B32110_01/webcenter.1013/b31074/jpsdg_java_intro.htm
First of all, we need think about my Web Application and login for it. The Java WebApp use Tomcat Realm based authentication. For make the Single Sign On between webcenter and tomcat I’ll create a class that intercepts the Tomcat Autenthicate request, get a header from HTTP Request and pass forward to tomcat autenthicate with a thread local, futher I’ll extend Realm Base class and make autenthication just using my headers. Here it’s a example:
public static ThreadLocal<String> loggedOnUser = new ThreadLocal<String>();
@Override
publicvoid invoke(Request req, Response resp) throws IOException, ServletException {
Principal princ = req.getPrincipal();
if (princ == null) {
String username = req.getHeader(“someCustomHeader”);
loggedOnUser.set(username);
}else {
System.out.println(“:: No header ” );
loggedOnUser.remove();
}
}
else {
System.out.println(“:: Already have a principal in request, do nothing.”);
}
getNext().invoke(req, resp);
}
}
In second classe, I extend the RealmBase and change the authenticate method, I added this lines to my custom method:
String header = HeaderAuthValve.
loggedOnUser.get();
if (header != null) {
return getPrincipal(header, “password”);
}
From now we has your application using just a header to autenthicate . In a production scenario you should thinking about the security for this case.
Now we know that beyond show the application in Webcenter Template it’s necessary set some header in http request for the application. And now we can discard the default External Application from Webcenter, because there isn’t options to send http headers using this method.
So, let’s talk about WebClipping Portlet.
WebClipping is a Oracle PDK Portlet that came with Webcenter and it’s based on Oracle Portal experiences. On really the WebClipping remains from the Oracle Portal portlets.
The main objective for the WebClipping is “clip” some pages to your application, it’s work like a iFrame but isn’t a iframe. So you’ll can keep your template and webClipping is worried about keep this.
So let’s do the integration. To do this you’ll need a default Webcenter Portal Application (http://download.oracle.com/docs/cd/E17904_01/webcenter.1111/e10273/createapp.htm)
First of all we need register the WebClipping producer. When you install Webcenter you have the Webclipping in WC_Portlets Managed server.
- Open Application Resources from your project. Click with the right button in Connections – New Connection – Oracle PDK Java Producer;

- Choose some name for you producer;

- Fill URL Endpoint with something
like that: <a href=”http://:8889/portalTools/webClipping/”>http://<port>:8889/portalTools/webClipping/ - Mark Enable Producer Sessions
- Finish;

- Open the home.jspx page
- Drang and drop Web Clipping Portlet to cust:panelCustomizable

- Select ADF Rich Portlet

- Run the portal

- Log in with a admin user. The default user is weblogic, pass: weblogic1
- Press CTRL + SHIFT + E to go in the Edit Mode
- Click in icon


- Insert the location from your application and click “start”
- Click Select
- Now you’ll come back to the original WebClipping configuring screen

- Change URL Rewriting to “inline”. With this option when you navigate in your clipped application you’ll continue in the same “page” that WebClipping Portlet is inserted, works like a iframe, but without a frame.
- Click Ok.

- Now you have your application Clipped.
- After do this, probably you’ll get some problemns. The main problemn is that WebClipping doesn’t keep the cookies from the user session. There’s a Enhancement Request in Metalink (Bug 3532654, Bug 7147665, Note 315805.1), if you’re reading this in a future that there isn’t this problemn, I’m happy for you! Please tell me in comments that you’re in this future =D
So, in this step, you can try connect WebClipping and a WebCenter External Application, this is a option. But this will solve just the problemn in the first time that you open the page with webClipping, don’t forgot that WebClipping doesn’t keep the user cookies. Maybe in some scenario using this two (WebClipping +
WebCenter External Application) solve the problem.
This is the first part of this topic. I’ll continue soon int part II. See ya.
Hi, everyone, it’s very common use a external LDAP in your webcenter application. There’s a lot of posts, blogs, documentation that is about that, but I’ll share my experiences here in this post.
There’s the steps:
1. Go to your Weblogic Console: <host>:<port>/console (for example: http://localhost:7001/console)
2. Log in with administration user;
3. In Domain Structure, go to Security Realm – myrealm
4. Open “providers” tab;
5. Choose New;
6. Fill the field Name, to Type choose your LDAP provider
for example: MS AD = ActiveDirectoryAuthenticator;
OID = OracleInternetDirectoryAuthenticator;
If your LDAP doesn’t matches with anyone provider, choose LDAPAuthenticator
7. In this example we’ll use ActiveDirectoryAuthenticator;
8. Press “OK”;
9. Now, you’ll came back to providers screen, click in provider that you just created;
10. Open “Provider Specific” tab;
11. Fill the fields host, port (default port is 389);
12. The field “principal” is the user that will authenticate in your MS AD to search users, groups, informations and etc. This user need only read permission in your Base DN. You nedd fill the full name of this user, for example:
CN=userWithReadPrivelegs,DC=company,DC=com,DC=br
13. Fill the password for this user in “credential” and “confirm credential” fields;
14. “User Base DN” is the directory that contains the MS AD users that will authenticate in WLS, for example:
ou=users,dc=company,dc=com,dc=br
15. “User form name filter” is the main difference between create an OID provider and a MS AD provider. For this example you need fill like the example above. If there other properties to define users, you need fill in this field.
WLS will use this filter to search and find your MS AD users.
(&(sAMAccountName=%u)(objectclass=user))
16. User name attribute: sAMAccountName
17. Group Base DN – the directory for users’s groups, for example:
ou=groups,dc=company,dc=com,dc=br
18. Group From Name Filter. The properties that define a group in your MS AD:
(&(cn=%g)(objectclass=group))
19. Leave other fields with the default values;
20. Save;
Before restart the WLS, do this steps:
21. Go to Commom tab and change Control Flag to SUFFICIENT;
22. Save again;
23. Back to your providers list, select DefaultAuthenticator and in Commom tab change Control Flag to SUFFICIENT, save;
24. Back to your providers list, click in reorder, change your MS AD to first position in list and save;
25. Now you’ll need restart all managed servers and the admin server;
After restart, to verify if works, go to “Security Realm – myrealm – Users and Groups”. Check if you can see all users and groups from MS AD.
Hope that help,
Best regards, see you soon!
Hi, this is my very first post. And I’ll talk about a problemn that I face some time ago.
I was working in a Intranet project, there’s some webcenter componentes (like user connections) and some site studio components like placeholders.
My problem starts when I tried use a placeholder in a jspx (ADF Faces) page. When you add a placeholder in a page, it’s allow users go to contribution mode (using ctrl+shift+f5 for example) .
The problems is: when you go contribution mode there’s a javascript that get the actually page, set contribution mode at the page session and redirect to page url, but this javascript don’t capture the “/faces” in ADF faces url, so when you try go to contribution mode you got:
Erro do OracleJSP:java.io.FileNotFoundException: MDS-00013
This is because the ADF can’t get the page without the “/faces” context.
To solve this problemn, just add the follow script code:
<script type=”text/javascript”>
// add faces to the contexts
WCM.contributionContext=WCM.contributionContext + “/faces”;
WCM.consumptionContext=WCM.consumptionContext + “/faces”;
WCM.designContext=WCM.designContext + “/faces”;
</script>
Mayber there’s a better way to do this, getting the wcm context object and set to edit mode, but the problemn that I can’t get the WCM Context in my Managed Bean. So let me know if someone do in another way.
Hope see you soon.
Bye


